What is Leaf Manipulation? The GCA Yellow Book definition is: "altering foliage by using one of the following techniques; folding, twisting, cutting, pleating, braiding, or wiring."
"These techniques should be used to strengthen the Principles and Elements of Design when composing your design. the Principles of Design are Balance, Contrast, Dominance, Proportion, Rhythm, and Scale. the elements of Design are color, Form, Light, Line, Pattern, Size, Space and Texture."
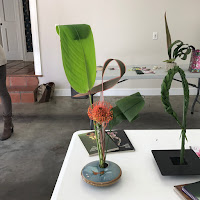
Anne brought Aspidistra, Horse Tail or Equisetum, Monstera, Flax and Sanseviera leaves.
One of the reference books Anne used was Gail Emmon's Leaf Manipulation Manual. Gail's book may be purchased through the website linked here. She first suggests conditioning your leaves by cutting the ends and submerging in buckets or the bath tub. Then, feel the leaves once work starts so that they can be warmed up and molded by your hands. Keep your items simple, clean and focused. She lists her tools: scissors, flower clippers, wire cutters, floral stapler & staples, scotch double-sided tape, straight wire in different gauges, floral tape, small cable ties, rulers, glue dots, utility knives and your hands!
Another reference she used is Bruno Duarte - the owner and creative director of Fresh Floral Creations in Toronto, Canada. Both Anne and Marion attended the 2016 Newport Flower Show where he was the featured arranger. At that show he focused on Texture and Movement. The photos at the bottom of the pages are ones that Anne took at Newport. Duarte is known for his innovative design techniques. Be sure and check out his photo gallery design page - I'm inspired!
A third reference is Mary Ellen O'Brien, a GCA club member from the Lenox Garden Club. On her website Flower Show Flowers, she offers links to Easy Fast Floral Designs, conditioning, styles, her blog and more. Sign up for her blog - it looks wonderful. The techniques or "Effects" below are listed by Mary Ellen:
- RIBBON: Using an Aspidistra leaf, gently fold the leaf lengthwise along the main rib. Wish scissors or clippers cut through the rib in 3 places about 1" apart from each other. The cuts should be about 1/4-3/8" deep. After making the cuts, pull each section outward. The sections can be turned and twisted for a great effect. Take the cut end and wrap with tape or wire and place into a water source.
- RIPPLES: Aspidistra leaves can be folded repeatedly to create this effect. They can be manipulated further by spinning the pleated portion around to create a rounded effect. Once satisfied with the overall look of the leaf, the leaf can be stapled together with a common household stapler. Placing several manipulated leaves together creates a petal effect.
- ROLLED: The Aspidistra leaf tips are rolled and the stems of Celosia are inserted through therolled end. The leaves are held in place with Glue Dots. End ends of the Aspidistra are allowed to fly freely without a water source; the leaves are very hardy and will not wilt for several days.
- CRISS CROSS: Two cuts are made down the length of the leaf on either side of a central rib. The two outside leaf sections are crisscrossed over the top and the bottom of the central rib. The central rib is stationary. The two outside sections can be fastened down with Oasis ® brand Blue dots. The finished leaves have a crisscross pattern tubular in style.
- SNAKESKIN: The Aspidistra leaf is cut lengthwise on either side of the central spine creating 2 pieces. The remaining spine piece is discarded. Then cut the flat leaves into squares all approximately the same size. Take on square, fold in half, then fold in half again around the base in ribbon-like fashion and hold with a glue dot. The small scale-like pieces are added around floral foam or can be stapled to another element (such as a potato sliced on the bottom creating a flat bottom).
- TUBULAR: Place an Aspidistra leaf on a flat surface with the tip and stem pointing in an East-West direction. Roll the leaf around a pencil or other tube-like object and make it as snug and tight as possible. The cut end may be stapled, tied or fastened with a Glue Dot.
- WOVEN: Lay the Aspidistra leaf on a cutting board and using a straight edge cut the leaf at even or uneven intervals as many times as desired. Longer stems can be woven through the cuts. Single or multiple stems may be placed into one leaf.
- ST'RING: With the leaf on a flat surface, make several small incisions near the outer edge of the leaf, trying to space them evenly apart. After the cuts are made, take a small object such as a toothpick and put it through the slit. Gently pull the toothpick through the leaf from one end to the other. The growth pattern of the leaf will keep the lines more or less parallel. Continue with as many slice as desired.
- PLEATED: Staring at the tip of the Aspidistra leaf, fold and staple; continuing until the central rib becomes stiff and hard to bend. If you choose to continue the full length of the stems the rigid central portion will break and look jagged; detracting from the overall appearance of the pleated leaves.


From the 2016 Newport Flower Show of Bruno Duarte and taken by Anne Silbernagel.


Other references:
Lakeside Garden Club: Leaf Manipulation
Pinterest: search leaf manipulation
YouTube videos (youtube.com): search leaf manipulation
No comments:
Post a Comment
Note: Only a member of this blog may post a comment.